12 Stunning Graduation Poster Ideas for a Memorable Celebration Display
Graduation is one of life’s biggest milestones, and marking it with something handmade and heartfelt makes the moment even more unforgettable. Whether you’re celebrating a kindergartner finishing their first year or a college senior crossing the stage after years of hard work, a creative poster is one of the most personal and affordable ways to show your pride.
This guide is packed with graduation poster ideas that range from simple and sweet to bold and eye-catching — all designed to inspire even the most non-crafty person in the room.
These are not generic templates. Every idea here comes with materials, steps, a time estimate, and a creative variation so you can make it your own. If you’ve been searching for fresh graduation poster ideas that are actually doable on a weekend, you’ve landed in the right place.
Whether you’re working with glitter and foam boards or going digital with printable designs, these graduation poster ideas have something for every budget and skill level. Here’s a round-up of graduation poster ideas that will photograph beautifully and last as a keepsake. The best graduation poster ideas are the ones that reflect the graduate’s personality — so feel free to mix, match, and make it yours.
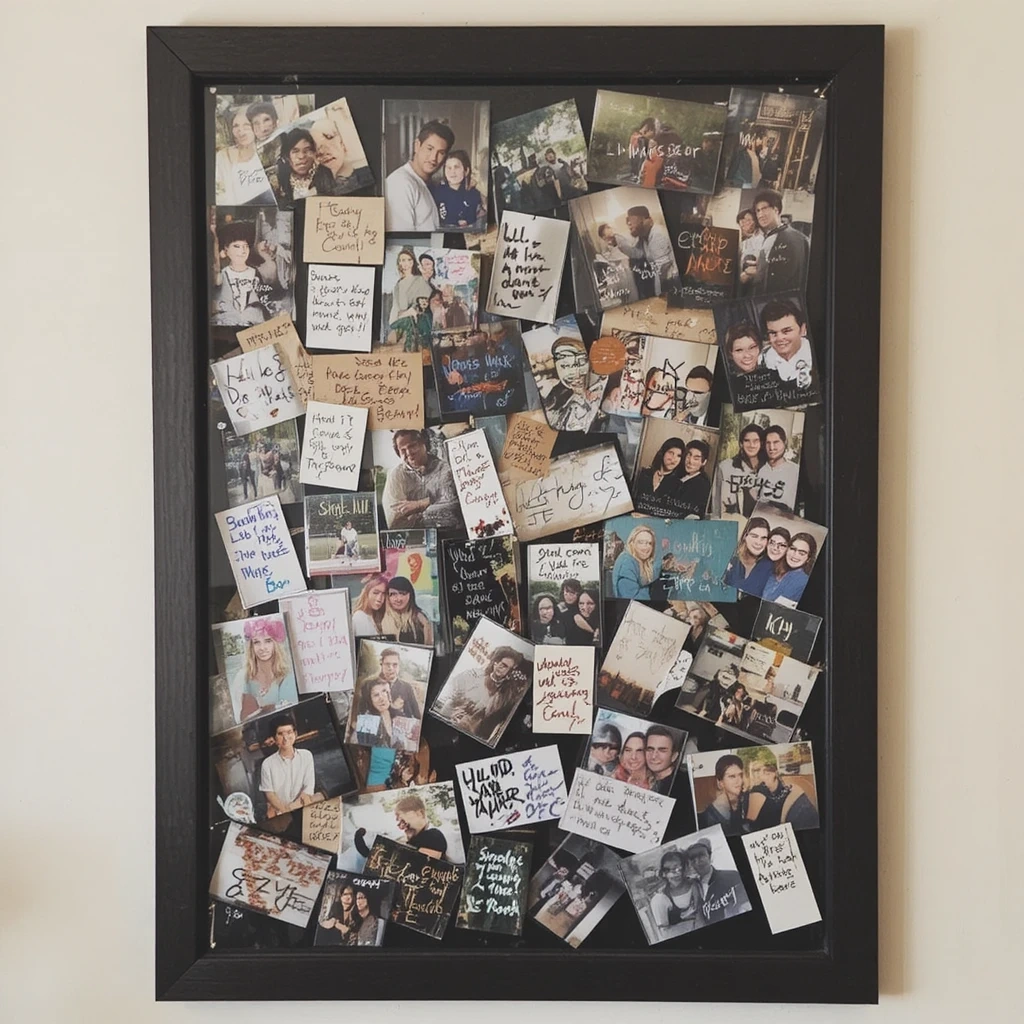
1. The Classic Photo Collage Graduation Poster
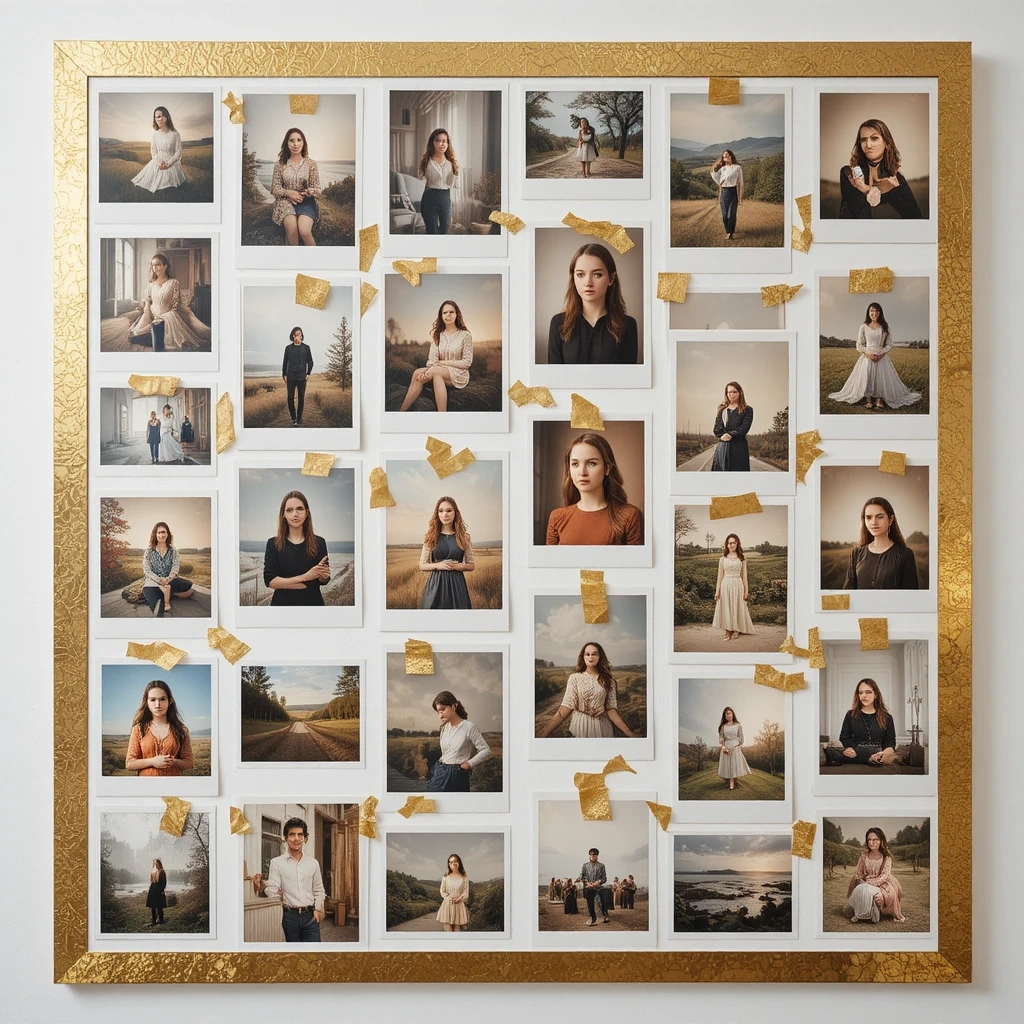
A photo collage poster takes the graduate on a visual journey through the years. Arrange childhood photos alongside recent snapshots to create a timeline of growth and milestones that guests will gather around all day long.
Materials:
- Large foam board or poster board (22″ x 28″)
- Printed photos (various sizes)
- Glue stick or double-sided tape
- Decorative border stickers or washi tape
- Markers for captions
Steps / How to Create:
- Choose 12–20 photos spanning different years and moments.
- Arrange them on the board without gluing first to find your ideal layout.
- Once you’re happy with the arrangement, glue everything down.
- Add short captions or dates under each photo using a marker.
- Frame the board with washi tape or sticker borders.
- Add the graduate’s name and graduation year at the top in bold lettering.
Time & Difficulty: 30 minutes | Easy
Best Use Case: Party backdrop, display table decor, or a gift to keep afterward.
Creative Variation: Use a string of fairy lights around the border for a glowing display that photographs beautifully at evening events.
2. The Bold Quote Graduation Poster
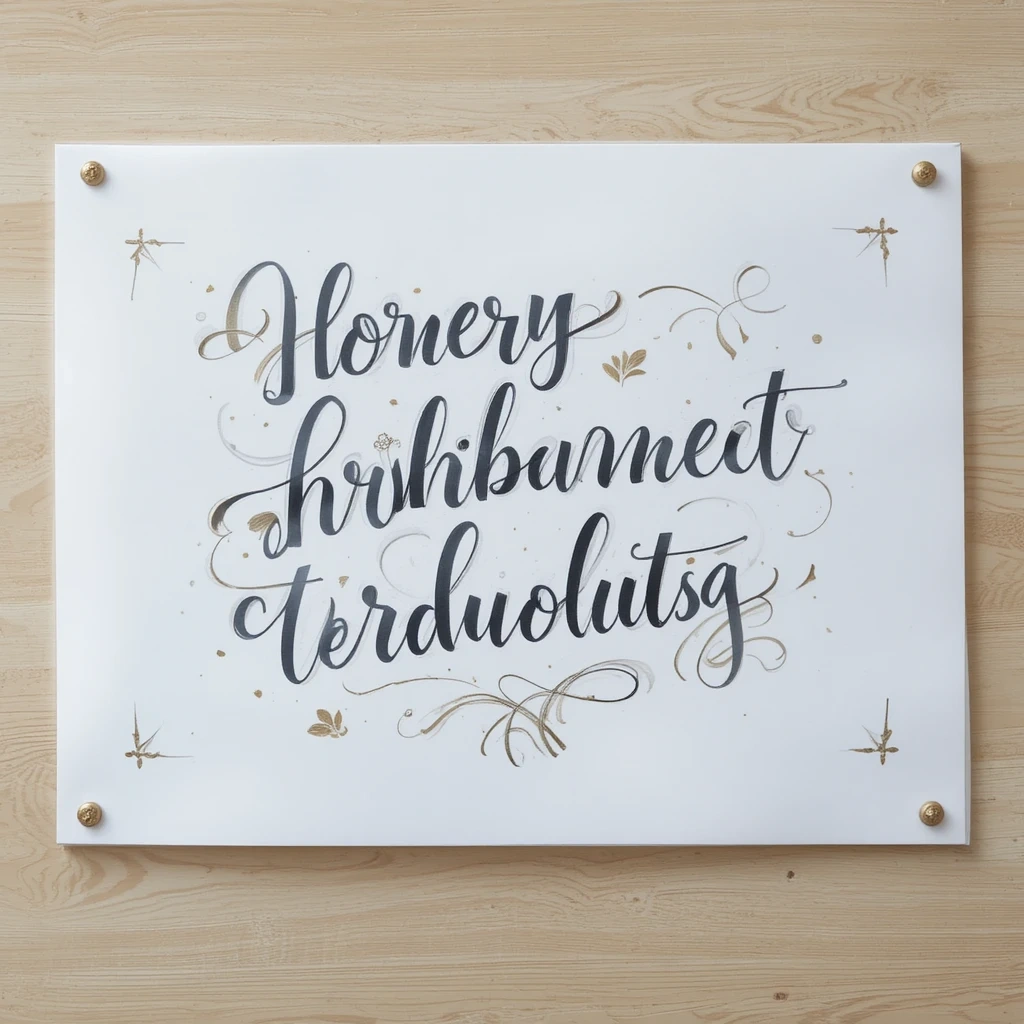
Sometimes the most powerful poster is the simplest one — a single meaningful quote, beautifully lettered, that captures everything the graduate is stepping into. Choose a quote that reflects their personality or future goals.
Materials:
- Thick poster board or canvas board
- Paint markers or acrylic paint + brush
- Pencil for sketching
- Ruler for guidelines
- Optional: glitter or metallic paint
Steps / How to Create:
- Lightly sketch your layout in pencil, dividing the board into zones for each line of the quote.
- Use paint markers to trace over the pencil lines in your chosen color.
- Add the graduate’s name and year underneath in a contrasting color.
- Let it dry completely before adding any embellishments.
- Outline letters with a contrasting color for a pop effect.
Time & Difficulty: 20–30 minutes | Easy
Best Use Case: Ceremony backdrop, doorway display, or framed wall art after the event.
Creative Variation: Use their school colors as the main palette to tie the poster directly to their graduating institution.
3. The Milestone Timeline Poster
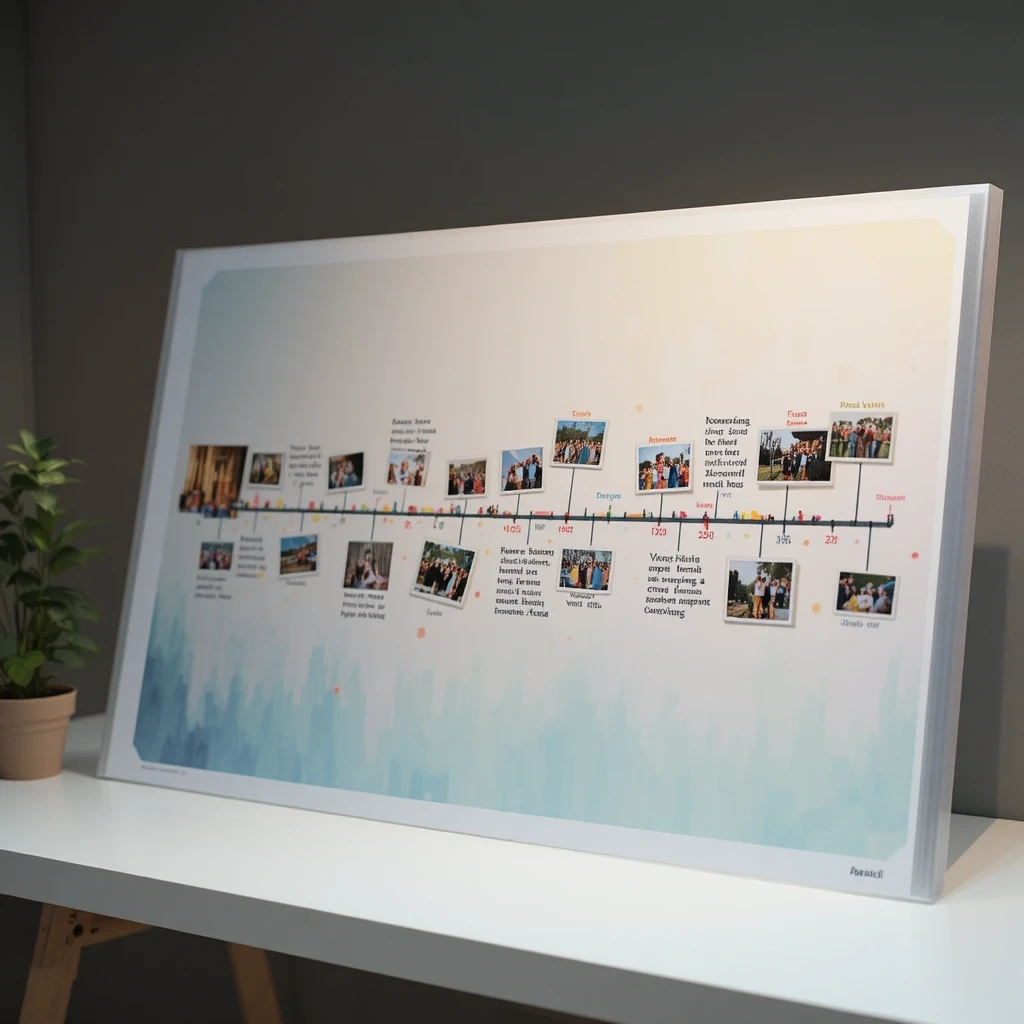
A milestone timeline poster tells the graduate’s story in chronological order, from their first day of school to graduation day. It’s part scrapbook, part tribute — and it’s one of the most touching things guests can look at during a party.
Materials:
- Poster board (horizontal layout works best)
- Ruler and markers
- Small printed photos or hand-drawn icons
- Stickers, stamps, or decorative tape
- Colored pens
Steps / How to Create:
- Draw a horizontal line across the center of the board.
- Mark key years or milestones at evenly spaced intervals.
- Attach photos or draw small illustrations above or below each mark.
- Write short descriptions beside each milestone.
- Decorate the line itself with stickers or tape for visual interest.
Time & Difficulty: 25–30 minutes | Easy to Medium
Best Use Case: Party table centerpiece or hallway display.
Creative Variation: Add a “What’s Next” section at the far right of the timeline to celebrate future goals and dreams.
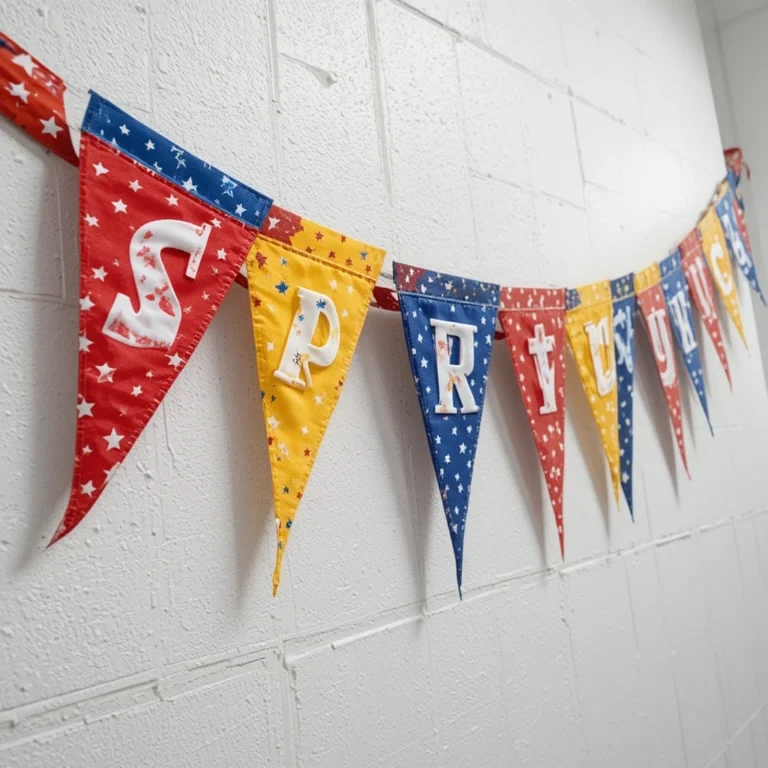
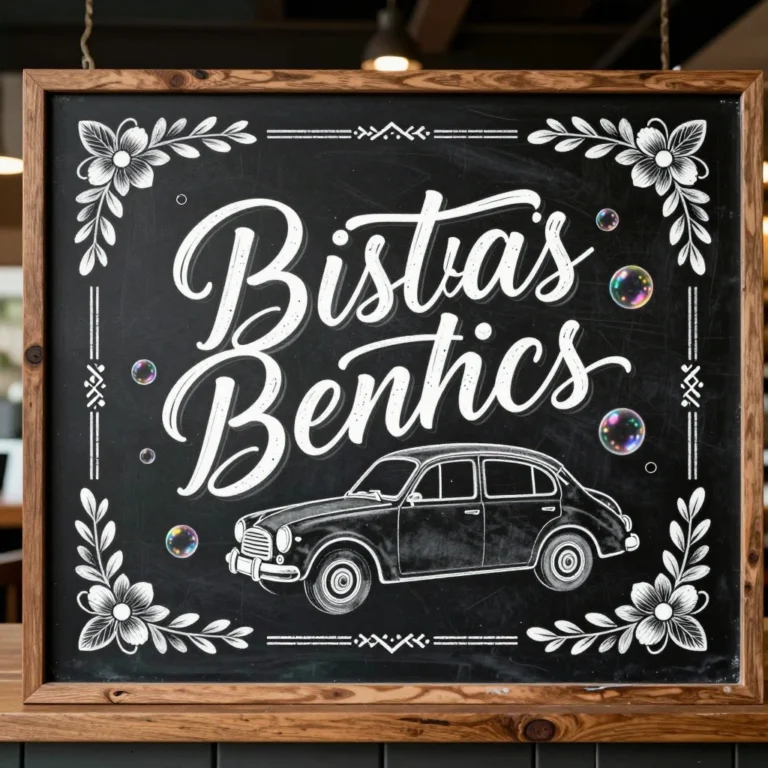
4. The Chalkboard-Style Graduation Poster
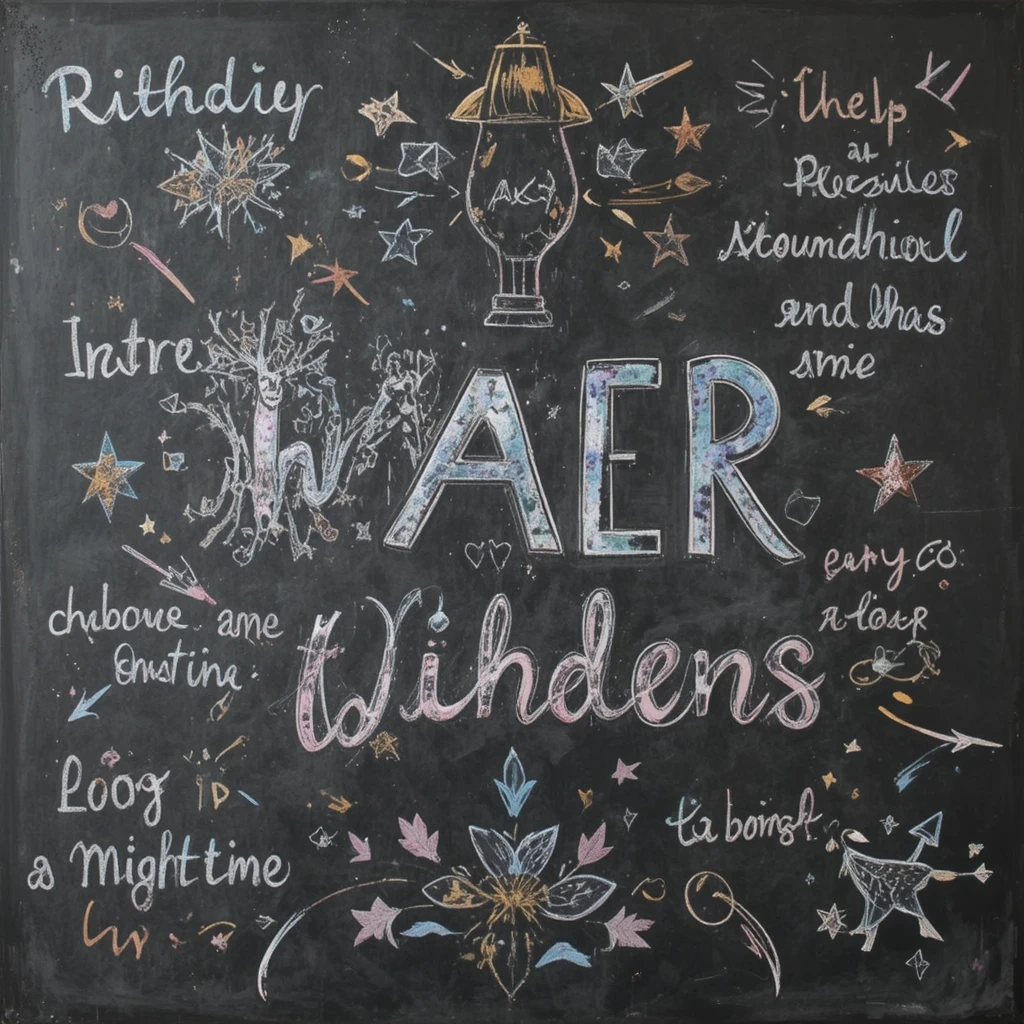
The chalkboard aesthetic never goes out of style. This look is warm, rustic, and incredibly versatile — it works for kindergarten graduations just as well as college send-offs.
Materials:
- Black foam board or black poster board
- White chalk markers
- Optional: colored chalk markers for accents
- Pencil template (optional for guides)
Steps / How to Create:
- Start with the graduate’s name in the center in large, chunky lettering.
- Surround it with smaller details like their school name, year, and a short quote.
- Fill empty spaces with doodles like stars, graduation caps, or confetti.
- Add a border using a chalk marker in a contrasting color like yellow or pink.
Time & Difficulty: 20 minutes | Easy
Best Use Case: Photo backdrop, mantel display, or entrance sign at the party.
Creative Variation: Use a real chalkboard and change the message for each graduate if you’re hosting a group celebration.
5. The “Then and Now” Graduation Poster
This crowd-pleasing idea pairs the graduate’s earliest school photo with their graduation photo side by side. It’s nostalgic, funny, and deeply sentimental all at once.
Materials:
- Poster board
- Two printed photos (one old, one new)
- Decorative frames cut from cardstock
- Markers and embellishments
Steps / How to Create:
- Divide the poster into two halves with a decorative divider line.
- Label the left side “Then” and the right side “Now.”
- Attach the childhood photo on the left and the graduation photo on the right.
- Add fun captions or speech bubbles if you want to give it a humorous twist.
- Decorate with stickers, confetti shapes, or their school colors.
Time & Difficulty: 15–20 minutes | Easy
Best Use Case: Party entrance display, photo booth prop, or social media-worthy keepsake.
Creative Variation: Add a middle section titled “Meanwhile…” and fill it with funny or memorable moments from the years in between.
6. The “Proud Family” Graduation Tribute Poster

This poster shifts the focus from the graduate to the people cheering them on. Each family member or close friend adds a note, drawing, or signature — turning the poster into a collaborative keepsake.
Materials:
- Large white or colored poster board
- Markers in various colors
- Center photo of the graduate
- Optional: printed name tags for participants
Steps / How to Create:
- Attach the graduate’s photo in the center of the board.
- Write their name and graduation year around the photo in bold.
- Leave the rest of the poster open for guests or family to write messages.
- Provide markers at the table so people can contribute during the party.
- Laminate or frame it after the event as a lasting keepsake.
Time & Difficulty: 10 minutes setup | Easy
Best Use Case: Party activity, reception table display, or long-term memory book.
Creative Variation: Divide the board into sections labeled “Advice,” “Wishes,” and “Favorite Memory” to guide what people write.
7. The DIY Neon-Effect Graduation Poster
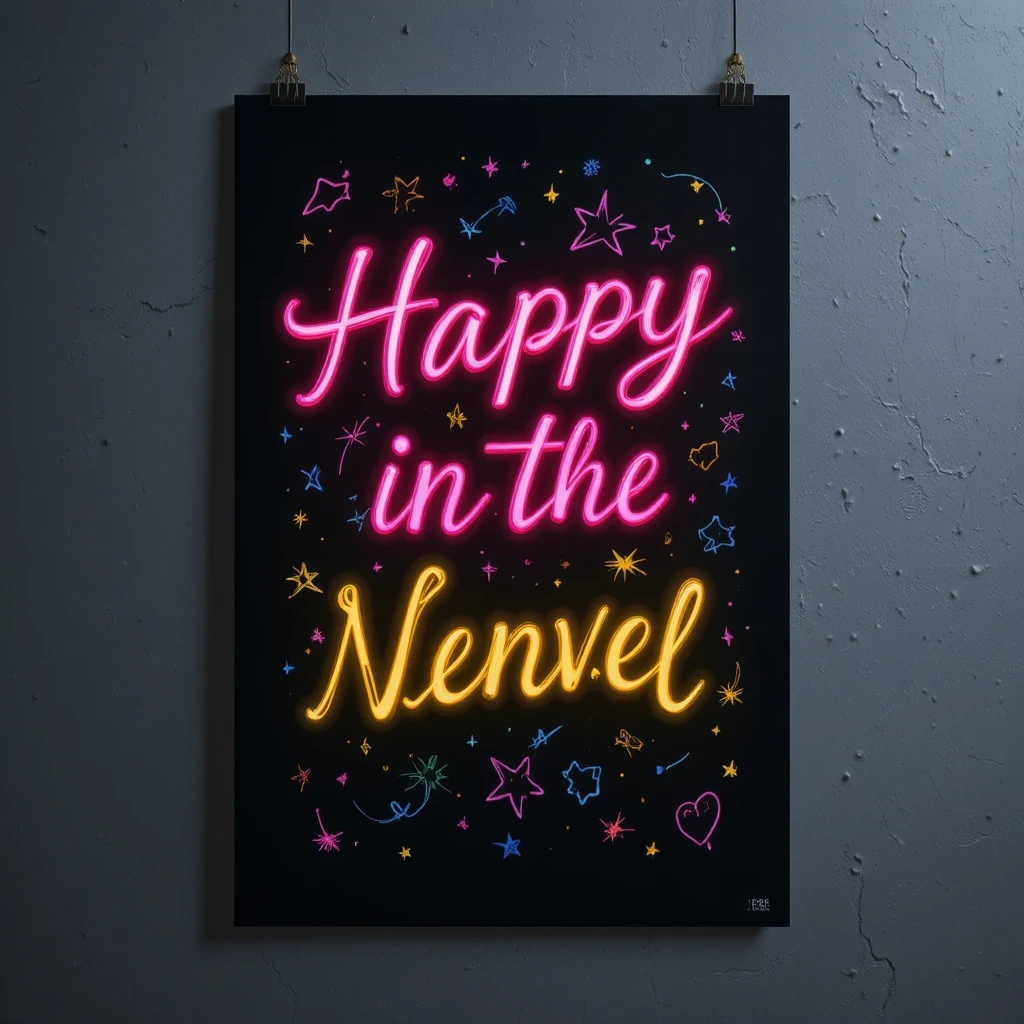
Neon posters are bold, vibrant, and absolutely unforgettable. This design uses bright markers or paint on a dark background to create a glowing, electric effect that stands out in any room.
Materials:
- Black or dark blue poster board
- Neon paint markers or fluorescent markers
- Pencil for sketching
- Optional: UV blacklight for a glowing party effect
Steps / How to Create:
- Lightly sketch your design in pencil on the dark board.
- Trace over with neon pink, yellow, or green paint markers.
- Focus on the graduate’s name as the centerpiece in the largest lettering.
- Add decorative elements like lightning bolts, stars, or geometric shapes.
- Let dry fully before displaying.
Time & Difficulty: 25 minutes | Medium
Best Use Case: Party backdrop, nighttime outdoor celebrations, or photo booth prop.
Creative Variation: Add a UV blacklight nearby during the party to make the neon markers genuinely glow in the dark.
8. The Watercolor Splash Graduation Poster
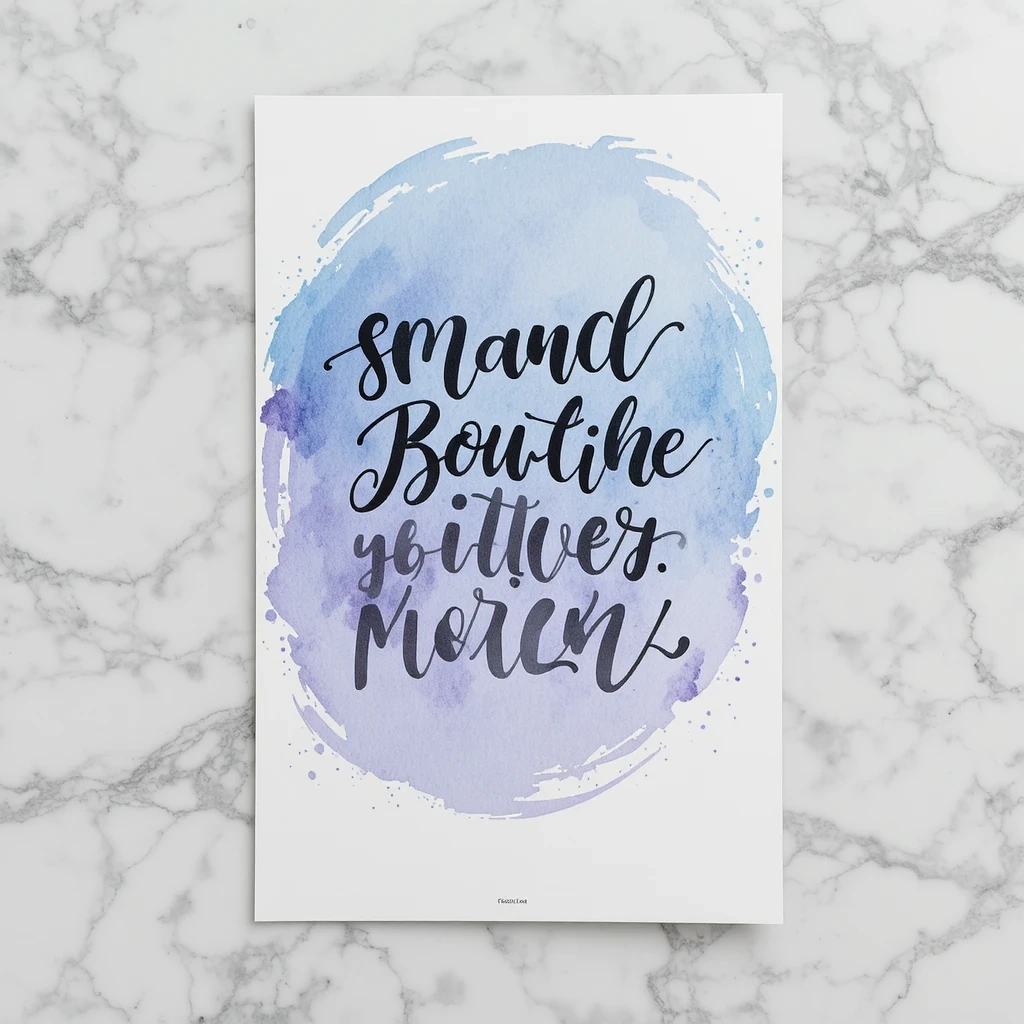
Watercolor posters feel artistic and one-of-a-kind. Even if you’ve never painted before, a simple watercolor wash as a background followed by bold lettering on top creates a stunning result.
Materials:
- Thick white poster board or watercolor paper
- Watercolor paints and a wide brush
- Black marker or paint pen for lettering
- Cup of water and paper towels
Steps / How to Create:
- Wet the poster board lightly with a damp brush.
- Drop in two to three watercolor shades and let them bleed together naturally.
- Allow to dry completely (about 15 minutes).
- Once dry, use a black marker to write the graduate’s name and year on top.
- Add simple details like a graduation cap illustration or confetti dots.
Time & Difficulty: 30 minutes (including dry time) | Easy
Best Use Case: Framed wall art, party decor, or gifting to the graduate.
Creative Variation: Choose watercolor shades that match the graduation gown or school colors for a cohesive look.
9. The Emoji and Highlights Graduation Poster
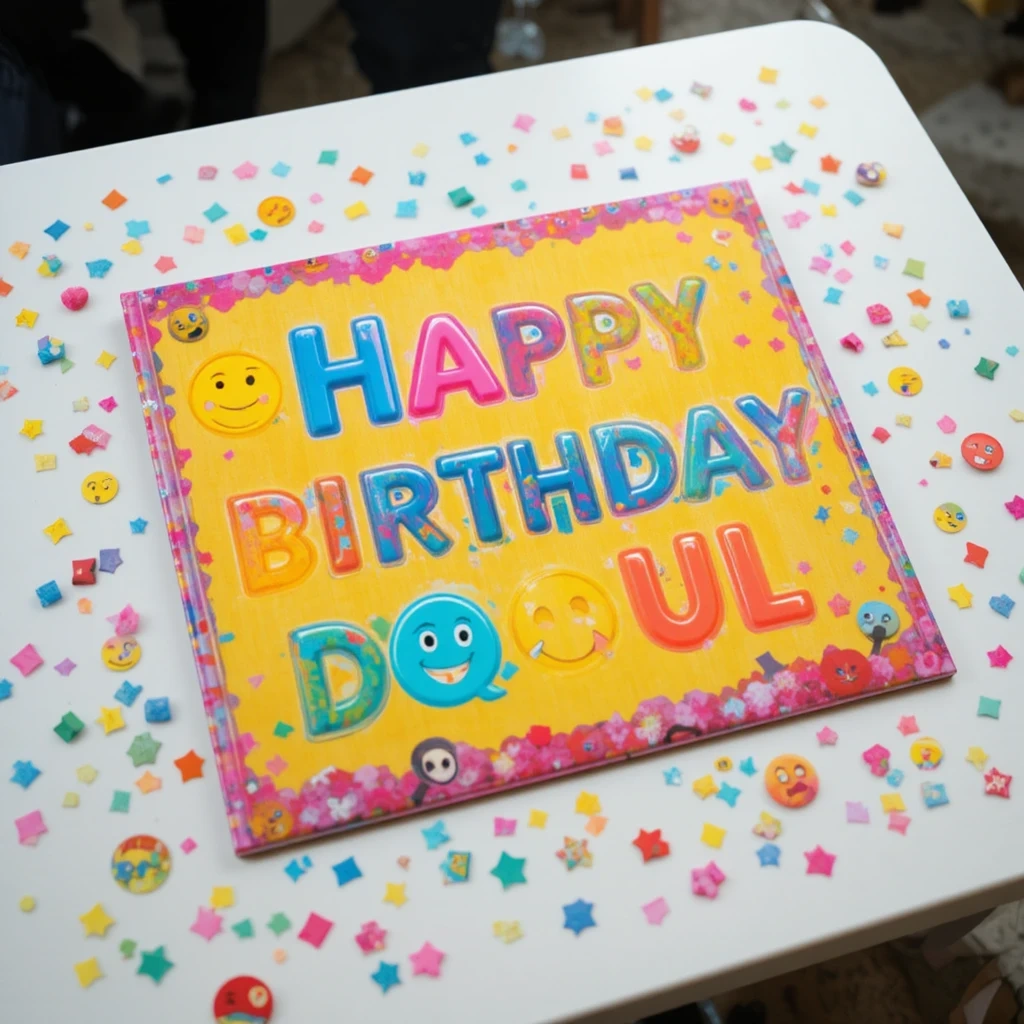
Perfect for younger graduates or anyone who loves a playful, modern vibe — this poster uses emojis and bright graphics to tell the graduate’s story in a fun, visual way.
Materials:
- Brightly colored poster board
- Printed emoji stickers or hand-drawn emojis
- Bold markers
- Fun fonts (traced from a printed template if needed)
Steps / How to Create:
- Write the graduate’s name across the top in bold, colorful block letters.
- Create sections for different highlights: “Favorite Memory,” “Future Plans,” “Best at…”
- Add matching emojis beside each highlight for visual fun.
- Decorate borders with additional emojis or small illustrations.
Time & Difficulty: 20 minutes | Easy
Best Use Case: School party, social media content, or a lighthearted gift.
Creative Variation: Make it interactive by leaving blank spaces and handing guests markers to add their own emoji messages.
10. The Letter Board Inspiration Poster
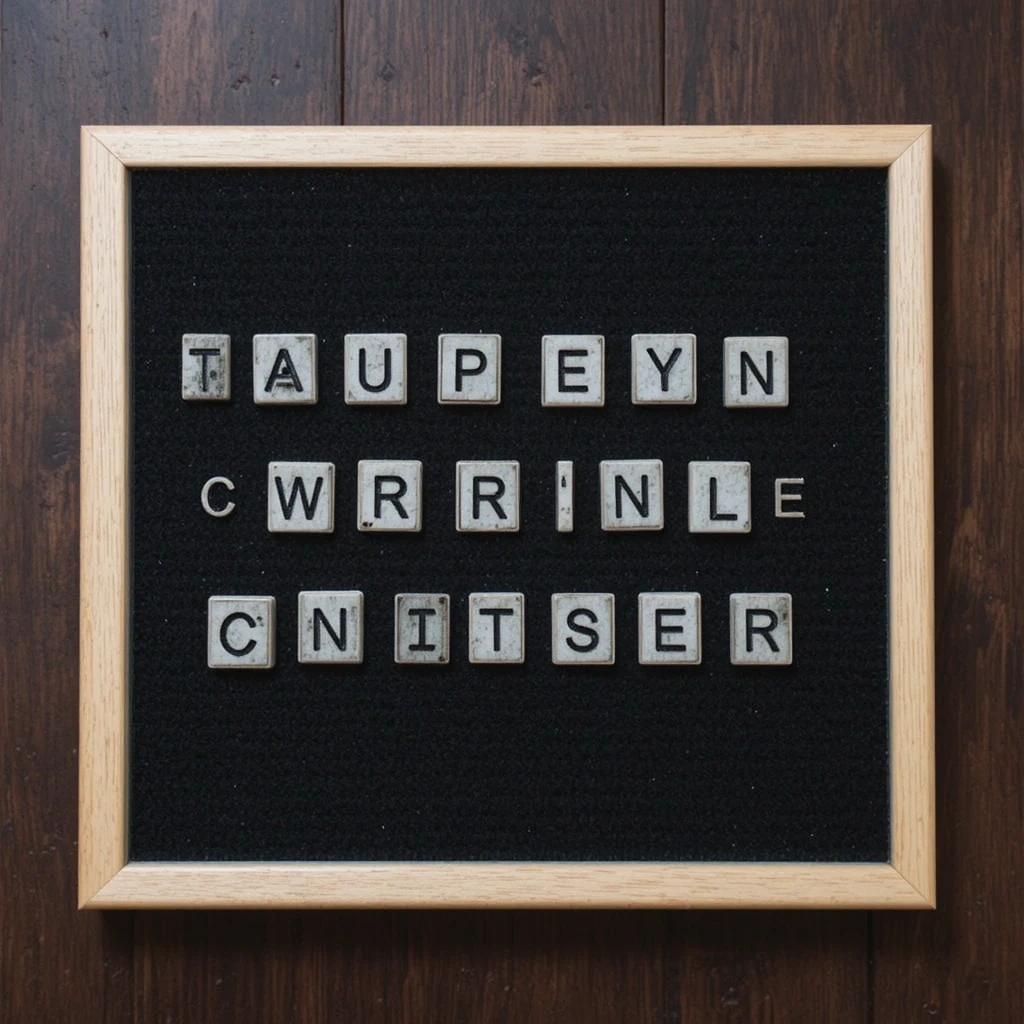
Recreate the aesthetic of a classic letter board using stencils or printed cutout letters arranged on a dark background. The result is clean, modern, and endlessly shareable.
Materials:
- Black foam board
- White cardstock letters (printed or purchased)
- Glue dots or adhesive foam squares
- Ruler for alignment
Steps / How to Create:
- Plan your message first — keep it short and impactful.
- Arrange your letters on the board before committing to glue.
- Use a ruler to ensure rows are straight.
- Glue each letter down securely with adhesive dots.
- Leave spacing between rows that mimics a real felt letter board.
Time & Difficulty: 20–25 minutes | Easy
Best Use Case: Party photo backdrop, event entrance, or home decor after the celebration.
Creative Variation: Add small colored letters in a different shade for a word or two to create visual emphasis.
11. The Glitter and Glam Graduation Poster
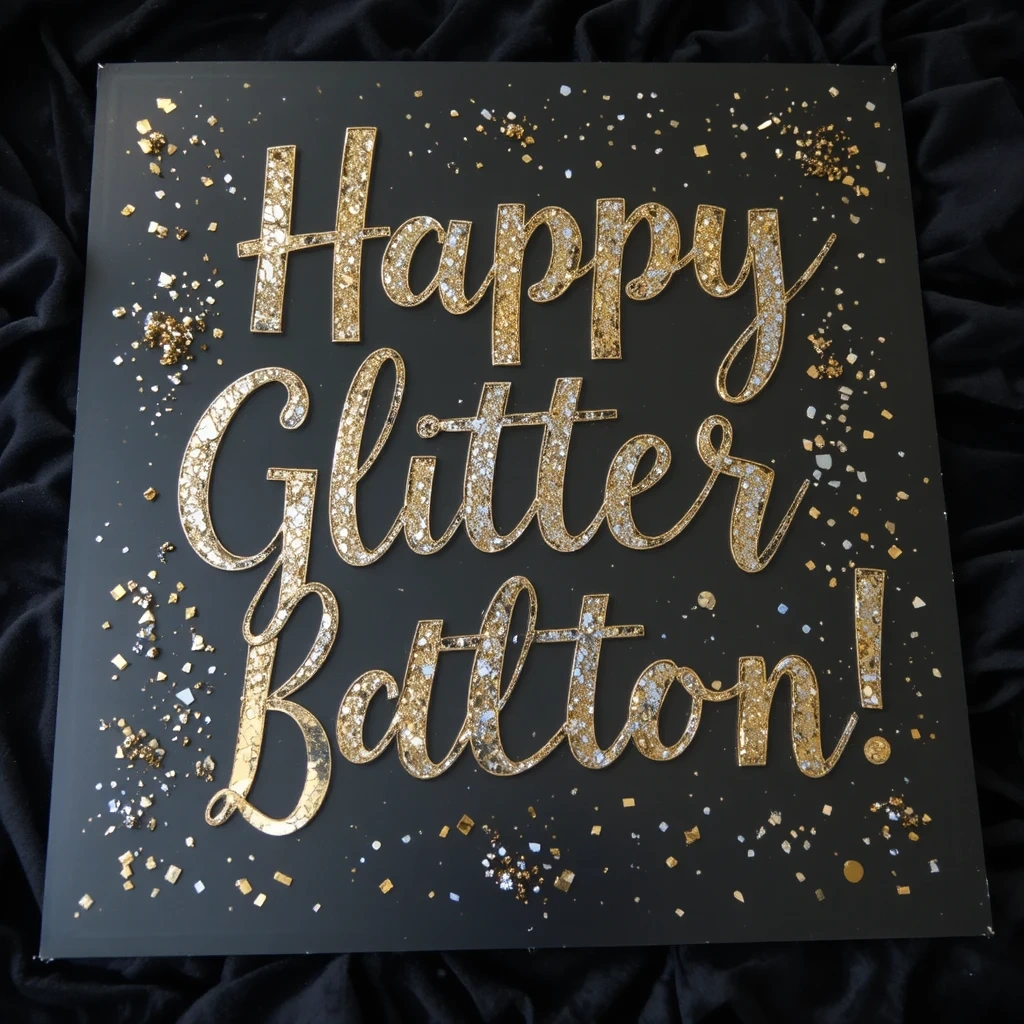
Some celebrations call for all the sparkle. A glitter graduation poster is bold, joyful, and completely on-brand for a big milestone moment. This one is especially popular for prom-style graduation parties.
Materials:
- White or black poster board
- Glitter glue or loose glitter with craft glue
- Paint markers or metallic markers
- Mod Podge or clear sealant to finish
Steps / How to Create:
- Sketch your design lightly in pencil.
- Apply craft glue to the areas you want to glitter, working in small sections.
- Sprinkle glitter over glue and shake off excess.
- Let dry completely, then apply a light coat of Mod Podge to seal.
- Use metallic markers for any additional lettering or details.
Time & Difficulty: 30 minutes + drying time | Medium
Best Use Case: Party backdrop, gift display table centerpiece, or a glamorous keepsake.
Creative Variation: Use glow-in-the-dark glitter for an unexpected after-dark effect at evening celebrations.
12. The DIY Photo Banner Poster
12 Graduation Poster Ideas: The Grand Finale Idea
Turn your final graduation poster into a full experience by combining a banner with hanging photos — creating a layered, dimensional display that goes beyond flat board designs. This one doubles as both a poster and a party decoration.
Materials:
- A wide banner or large poster board as the base
- String or twine
- Mini clothespins or binder clips
- Printed photos (wallet-size or 4×6)
- Markers and decorative paper
Steps / How to Create:
- Hang your base banner on the wall or across a mantel.
- Below it, string two to three horizontal lines of twine at varying heights.
- Clip photos to the twine using mini clothespins.
- Arrange photos in any order — chronological, thematic, or random.
- Write the graduate’s name and year on the banner above the photo strings.
- Add paper stars, flowers, or bunting for extra dimension.
Time & Difficulty: 25–30 minutes | Medium
Best Use Case: Party photo wall, living room display, or social media backdrop.
Budget-Friendly Graduation Poster Ideas Guide
You don’t need to spend much to make something genuinely beautiful. Here’s how to keep costs low without cutting corners on creativity:
- Dollar Tree is your best friend. Foam boards, markers, glitter glue, sticker sheets, and washi tape are all available for a dollar or less.
- Print photos at home or use a pharmacy’s self-service kiosk — 4×6 prints typically cost under $0.20 each.
- Repurpose what you have. An old picture frame becomes a sign holder. Leftover wrapping paper becomes a patterned backdrop.
- Go digital for lettering. Print large bold text at home and trace or cut it out rather than hand-lettering freehand.
- Use one statement material. Pick one splurge item — metallic markers, a roll of ribbon, or a sheet of specialty paper — and build everything else around it economically.
Common Mistakes to Avoid
1. Overcrowding the poster. Trying to fit every photo, memory, and message into one space makes the poster hard to read and visually overwhelming. Choose a focus and leave breathing room around your design elements.
2. Using low-quality printed photos. Blurry or pixelated photos will drag down even the most beautifully crafted poster. Always print at the highest quality available and use actual photo paper for the best results.
3. Forgetting to seal glitter projects. Glitter migrates — everywhere. If you’ve used loose glitter, always finish with a coat of Mod Podge or clear sealant before the poster goes anywhere near good clothing or furniture.
Tips for Best Results
- Plan your layout on paper first. Sketch a rough thumbnail before committing to the actual poster board — it saves a lot of rework.
- Use a ruler for straight text. Even freehand posters look more polished when lettering sits on a straight baseline.
- Give yourself time to dry. Rushing glue, paint, or glitter leads to smudges. Build in at least 15 minutes of drying time between layers.
- Test markers on a scrap first. Some markers bleed on certain board types — always test before writing on your final piece.
- Photograph your poster before the party. People will move it, touch it, and lean things against it. Get your clean photo first.
- Display at eye level. A beautiful poster loses its impact if guests have to crane their necks or bend down to see it.
FAQs
Q: What size poster board is best for a graduation party? The most common size is 22″ x 28″ — large enough to display multiple photos or a bold design but easy to carry and transport. For photo backdrops, go larger with a 36″ x 48″ display.
Q: How far in advance should I make the graduation poster? Aim for at least 3–5 days before the event so you have time to fix mistakes, add photos, and let everything dry fully without rushing.
Q: Can I make a graduation poster without any artistic skills? Absolutely. Some of the most effective designs are the simplest ones — a clean quote, a few great photos, and a bold border. You don’t need artistic skill to create something meaningful.
Q: What’s the best way to display a graduation poster without damaging walls? Use removable adhesive strips (like Command strips) on the back of the board, or prop the poster on an easel for a freestanding display that requires no wall contact at all.
Q: How do I make a graduation poster waterproof for outdoor parties? Apply a thin coat of Mod Podge Outdoor formula over the entire finished surface, or laminate the poster at a copy shop before the event.
Q: What do I do with the poster after the party? Frame it, laminate it, or photograph it and have it reprinted as a canvas. Many graduates keep these for years — a framed poster makes a wonderful bedroom or dorm room decoration.
Conclusion
Graduation marks the end of one incredible chapter and the beginning of something even bigger. A handmade poster captures that energy in a way no store-bought decoration ever could. Whether you spend twenty minutes or three hours on your design, the thought and love you put into it will come through every time someone stops to look.
Pick the idea that feels most like the graduate you’re celebrating, gather your supplies, and start creating. You’ve got everything you need right here — now go make something they’ll remember forever.