10 Wedding Thank You Cards Ideas That Will Leave Your Guests Speechless
After the flowers have wilted and the dance floor has emptied, one small gesture still has the power to make your wedding unforgettable — your thank you cards. Wedding thank you cards are more than just a polite formality; they’re a heartfelt extension of your big day, a chance to let every single guest know how much their presence and generosity meant to you.
Whether you’re a crafty couple or a total DIY beginner, there’s a style here that fits your vibe perfectly. In this article, you’ll discover 10 creative, budget-friendly, and beautifully personal ideas to make your thank you notes truly shine.
Wedding thank you cards don’t have to be generic — they can reflect your unique love story.
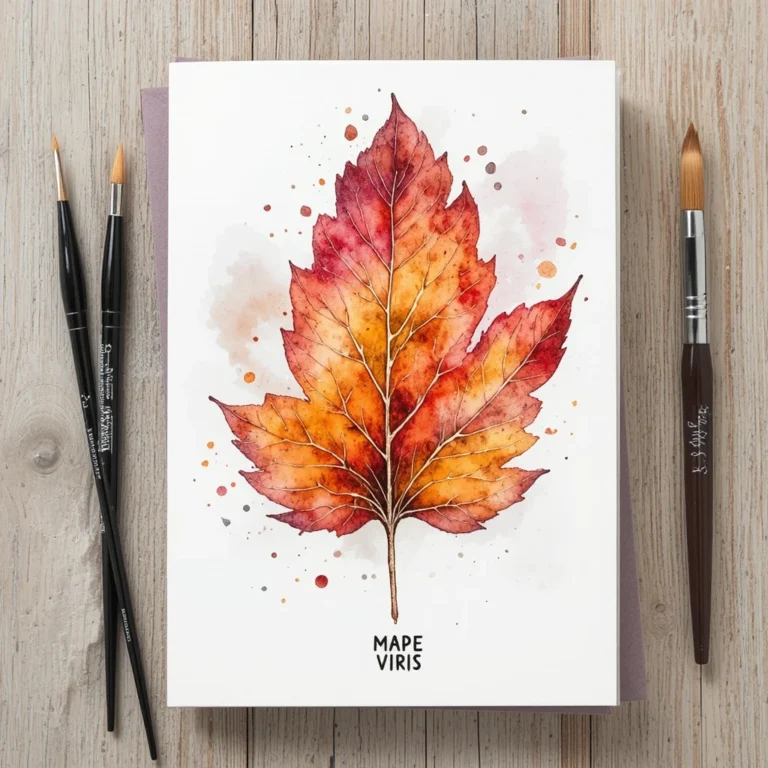
1. Watercolor Floral Wedding Thank You Cards

Soft, romantic, and completely timeless — watercolor floral thank you cards are one of the most beloved choices for newlyweds. These cards capture the dreamy aesthetic of a wedding day with loose, painterly blooms in blush, sage, or dusty blue tones. Even if you’ve never picked up a paintbrush, a few simple techniques can create a stunning result.
Materials:
- Watercolor paper cards (pre-folded or cut to size)
- Watercolor paints (a basic 12-color set works great)
- Fine-tip paintbrush and a larger wash brush
- Fine-tip black pen or calligraphy pen
- Water cup and paper towels
Steps / How to Create:
- Lightly sketch small flower shapes (roses, peonies, or wildflowers) in pencil along the top or corner of the card.
- Using your larger brush, wet the area you’ll paint first.
- Drop in your chosen watercolor and let it bloom naturally — don’t overwork it.
- Add detail petals with your fine brush once the base layer dries.
- Write your message in the center with the calligraphy pen once fully dry.
Time: 20–30 min per card | Difficulty: Easy
Best Use Case: Wedding gift enclosures, mailed thank you notes, keepsake cards
Creative Variation: Add metallic gold accents with a gold paint pen over dried watercolor areas for a luxe finish.
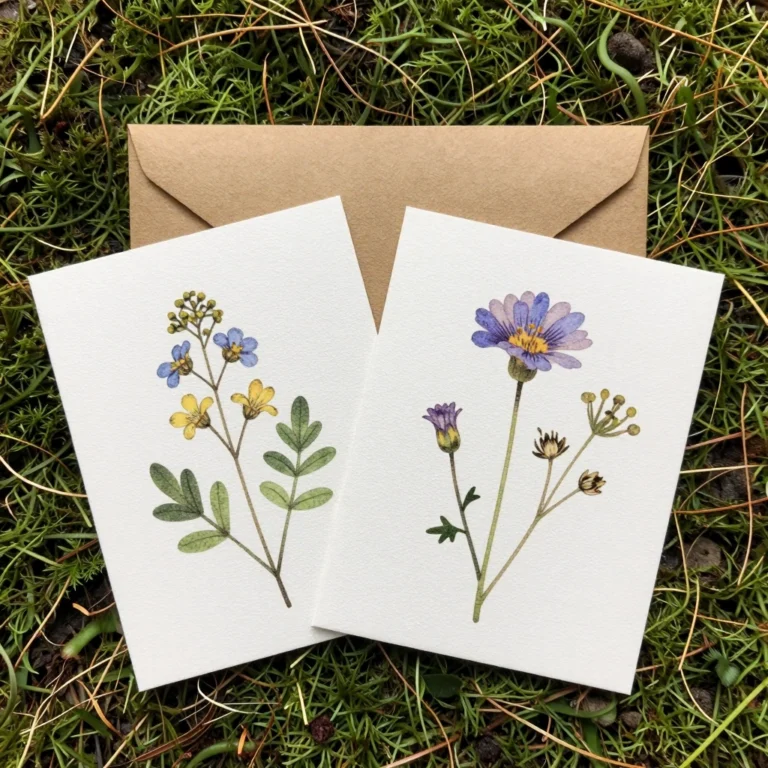
2. Pressed Flower Thank You Cards
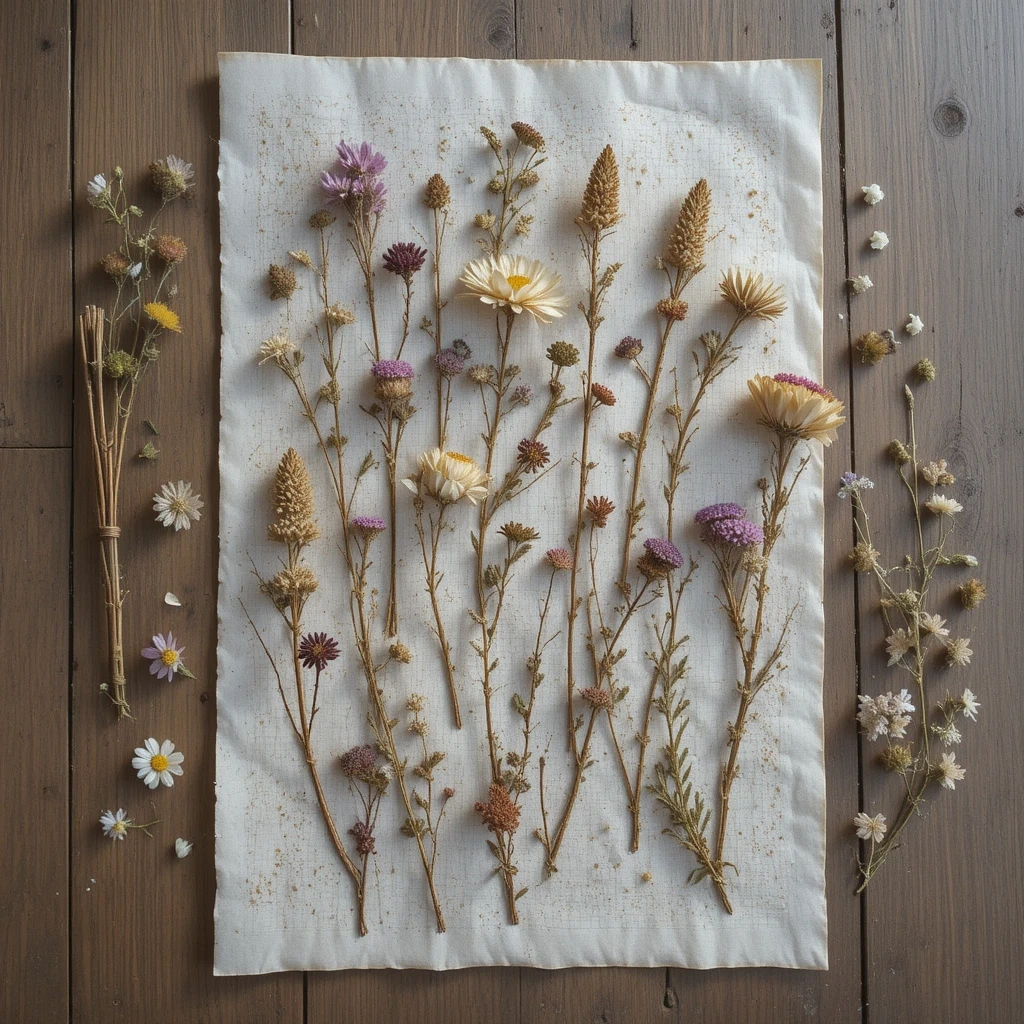
There’s something undeniably magical about using real flowers in your stationery. Pressed flower cards are elegant, eco-friendly, and one-of-a-kind — no two will ever look exactly alike. If you have leftover blooms from your bouquet or centerpieces, this is the most sentimental way to repurpose them.
Materials:
- Blank white or cream cardstock
- Fresh or pre-pressed flowers (pansies, daisies, lavender work best)
- Mod Podge or clear-drying craft glue
- Foam brush
- Twine or ribbon (optional)
Steps / How to Create:
- Press fresh flowers in a heavy book between parchment paper for 1–2 weeks, or purchase pre-dried pressed flowers.
- Arrange your flowers on the front of the card in a pleasing composition.
- Use a foam brush to apply a thin layer of Mod Podge over the flowers to adhere them.
- Let dry completely (about 30 minutes).
- Apply a second thin sealing coat for durability.
- Write your message inside and add a small ribbon bow at the corner for a finishing touch.
Time: 15 min (plus drying time) | Difficulty: Easy
Best Use Case: Wedding thank you notes, bridal shower follow-ups, intimate wedding guests
Creative Variation: Scan your pressed flower card before sealing it and create digital prints for guests far away.
3. Kraft Paper Rustic Thank You Cards

For the couple who loved a barn wedding, garden ceremony, or earthy aesthetic, kraft paper cards feel perfectly on-brand. Their warm, organic texture pairs beautifully with hand-lettering, stamps, and natural twine. Simple, affordable, and incredibly charming.
Materials:
- Kraft paper card blanks
- White or gold ink pen
- Rubber stamps (floral or geometric)
- Ink pad (in coordinating color)
- Twine or jute ribbon
Steps / How to Create:
- Use a rubber stamp and ink pad to create a pattern or motif on the front of the card (a small floral sprig, leaf, or geometric shape).
- Let the ink dry for 2 minutes.
- Write your thank you message inside using a white gel pen for contrast.
- Add your name and date on the back.
- Thread a small piece of twine through a punched hole in the top corner for an extra rustic charm.
Time: 10–15 min per card | Difficulty: Easy
Best Use Case: Rustic, boho, or outdoor wedding styles; gifts for local guests
Creative Variation: Burn the edges slightly with a lighter for an aged, vintage look — do this before writing.
4. Photo Collage Wedding Thank You Cards
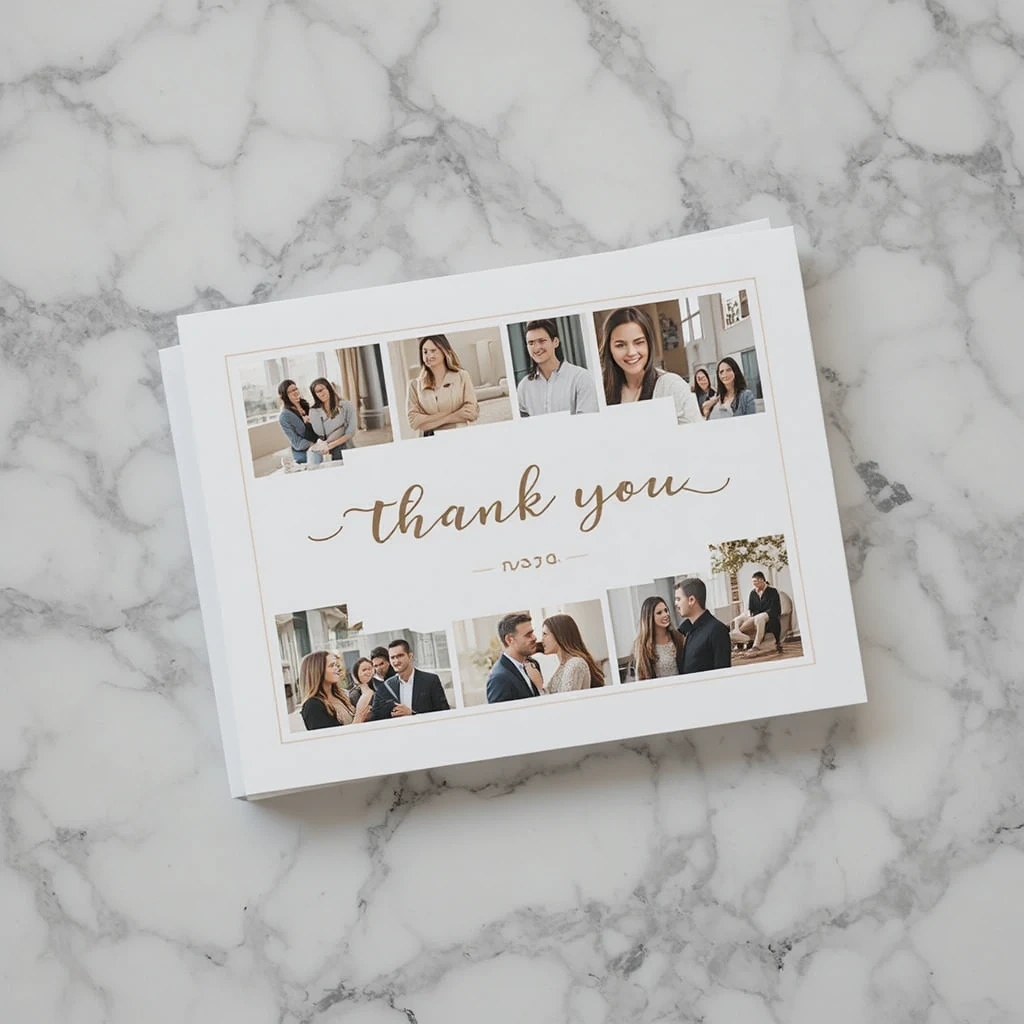
Why send a plain card when you can send a snapshot of your happiest day? Photo collage cards are a crowd-pleaser — guests love seeing themselves in the photos or catching a glimpse of the magical moments they may have missed. These are especially easy to create online and print at home or through a service.
Materials:
- High-resolution wedding photos (3–5 favorites)
- Free design tools (Canva, Adobe Express)
- Card-weight paper or professional printing service
- Envelopes
Steps / How to Create:
- Choose 3–5 wedding photos that capture different moments — ceremony, first dance, candid laughs.
- Open a free Canva account and select a “Thank You Card” template.
- Drag and drop your photos into the layout.
- Customize the font, colors, and message to match your wedding aesthetic.
- Download and print at home on cardstock, or order prints through Canva, Zazzle, or a local printer.
Time: 20–25 min design + print time | Difficulty: Easy
Best Use Case: All wedding styles; best for couples with stunning professional photos
Creative Variation: Add a QR code linking to your wedding photo gallery so guests can relive the whole day.
5. Wax Seal Envelope Wedding Thank You Cards
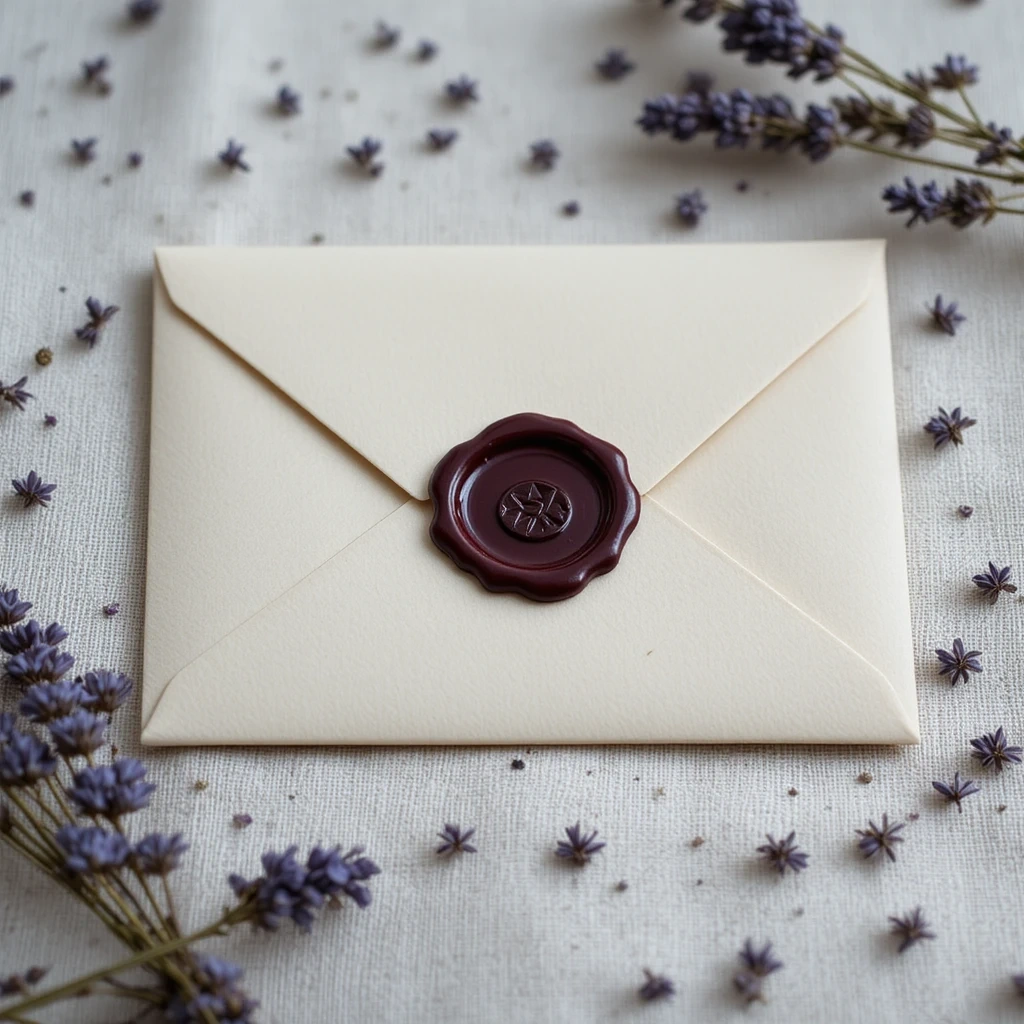
Few details feel as luxurious and intentional as a wax seal. Adding one to your thank you card envelopes instantly elevates the presentation — it’s the kind of detail guests notice before they even open the card. And it’s much easier to do than it looks.
Materials:
- Blank cards and envelopes
- Wax seal kit (wax sticks + melting spoon or glue gun-style tool)
- Wax seal stamp with monogram or floral design
- Taper candle or lighter
- Cardstock for the inner card
Steps / How to Create:
- Write and fold your thank you card and place it in the envelope.
- Hold your wax stick over the sealed flap and melt a small puddle of wax using the melting spoon over a candle.
- Pour the melted wax onto the envelope flap quickly.
- Press your seal stamp firmly into the wax for 5–10 seconds without rocking.
- Lift straight up for a clean impression.
Time: 10–15 min per batch | Difficulty: Medium
Best Use Case: Formal, romantic, or vintage-style weddings; upscale presentation
Creative Variation: Use two colors of wax swirled together for a marbled effect unique to your card set.
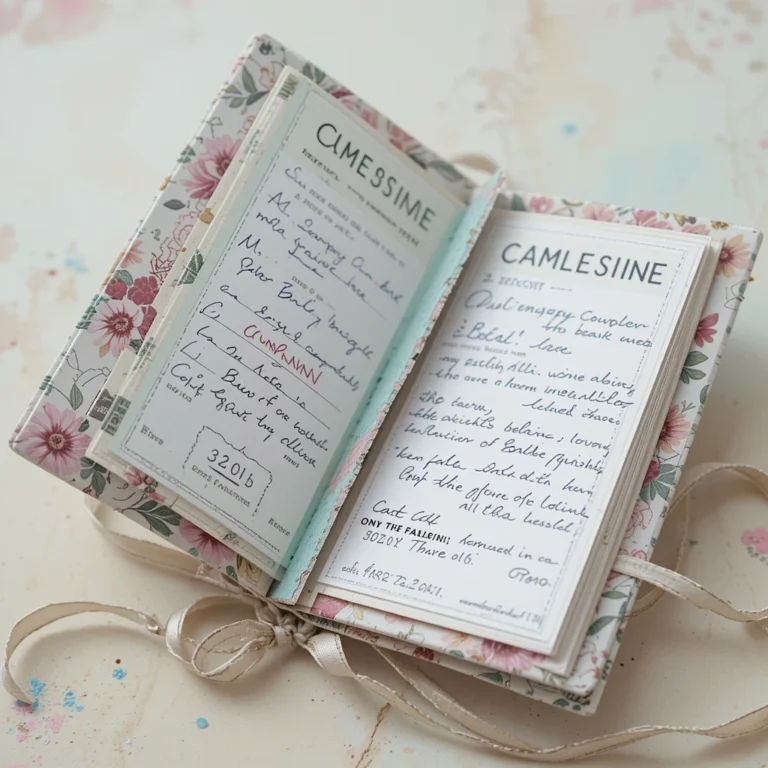
6. Hand-Lettered Calligraphy Thank You Cards

Calligraphy thank you cards feel luxurious and completely personal. Even if you’re a beginner, modern calligraphy is very forgiving — there’s no strict rulebook, and the beautiful imperfections are part of the charm. All it takes is a little practice and the right tools.
Materials:
- Smooth white or blush cardstock
- Brush pens (Tombow Dual Brush is beginner-friendly)
- Pencil and ruler for light guidelines
- Eraser
Steps / How to Create:
- Lightly draw horizontal guidelines in pencil to keep your writing level.
- Practice your letters on scrap paper first — modern calligraphy uses thick downstrokes and thin upstrokes.
- Write “Thank You” in script at the top of the card as the focal point.
- Add your personal message below in neat print or a complementary font style.
- Erase pencil guidelines once ink dries completely.
Time: 15–25 min per card | Difficulty: Medium
Best Use Case: Intimate weddings, handmade gift card pairings, close friends and family
Creative Variation: Write each guest’s name in calligraphy on the front of the card for a truly personalized touch.
7. Minimalist Black & White Wedding Thank You Cards

Sometimes less truly is more. A clean black-and-white thank you card with elegant typography makes a bold, modern statement that never goes out of style. These are ideal for couples who prefer simplicity over ornate details.
Materials:
- White or black matte cardstock
- Free design tool (Canva or Google Slides)
- Printer with black ink
- Scissors or paper cutter
Steps / How to Create:
- Open Canva and choose a minimal card template (search “minimalist thank you card”).
- Select a clean serif or sans-serif font — think Times New Roman, Playfair Display, or Lato.
- Type your thank you message keeping text centered and simple.
- Add a thin border or a single line accent in black or gold.
- Print on cardstock and cut to size with a paper cutter for crisp edges.
Time: 15 min design + print time | Difficulty: Easy
Best Use Case: Modern, city weddings, black-tie events, design-forward couples
Creative Variation: Print on black card and use white ink for a dramatic reverse effect.
8. Dried Herb & Seed Packet Wedding Thank You Cards

Give your guests something they can actually grow. Attaching a small seed or herb packet to your thank you card is the most thoughtful, eco-conscious idea on this list. It’s a living reminder of your wedding day that guests will appreciate long after the celebration ends.
Materials:
- Small glassine envelopes or seed packets
- Seeds (wildflowers, lavender, basil, or herbs)
- Kraft or linen card blanks
- Ribbon or baker’s twine
- Handwritten or printed labels
Steps / How to Create:
- Fill small glassine envelopes with a pinch of your chosen seeds.
- Seal the envelope and add a small label: “Grow with love – [Your Names].”
- Attach the seed packet to the front of your thank you card using a loop of baker’s twine.
- Write your heartfelt message inside the card.
- Tuck inside a matching envelope and mail.
Time: 15–20 min per card | Difficulty: Easy
Best Use Case: Garden weddings, eco-conscious couples, spring/summer weddings
Creative Variation: Use herb seeds like basil or mint so guests can grow something they’ll use in the kitchen.
9. Illustrated Map Thank You Cards
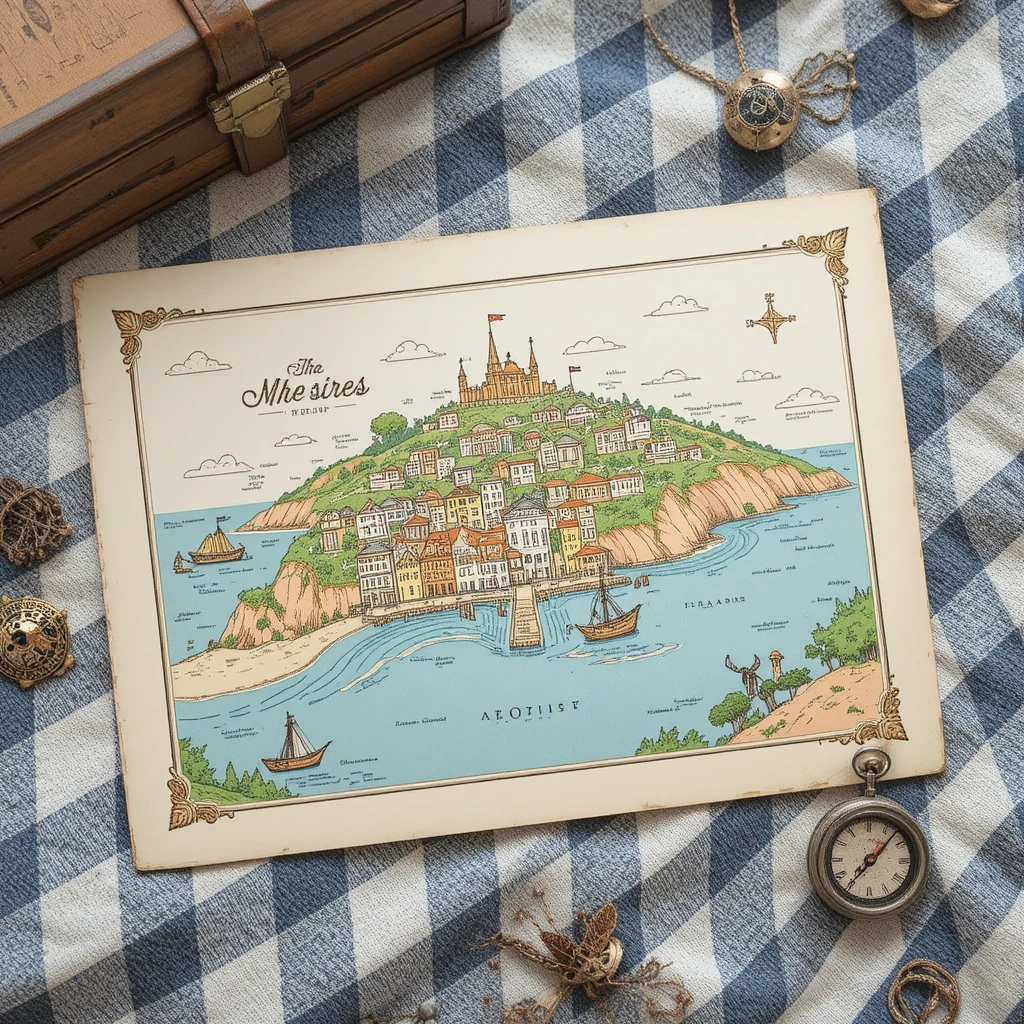
If your wedding was held at a meaningful location — a vineyard, a beach town, a family farm — why not turn it into art? Custom illustrated map cards are charming, narrative, and completely unique to your love story.
Materials:
- Illustrated map design (DIY on Canva or commission on Etsy)
- Card-weight paper
- Printer
- Watercolor markers for hand-finishing (optional)
Steps / How to Create:
- Search Canva or Etsy for a “custom wedding map illustration” template featuring your wedding location.
- Customize it with the venue name, city, and a short caption like “Where it all began.”
- Print double-sided — map on front, message on the back.
- Optionally, lightly hand-color portions of the printed map with watercolor markers.
- Trim to card size and place in matching envelopes.
Time: 20–30 min | Difficulty: Easy to Medium
Best Use Case: Destination weddings, venue-specific celebrations, guests who traveled far
Creative Variation: Add a heart pin icon over the exact ceremony spot on the map.
10. Wedding Thank You Cards with a Custom Poem
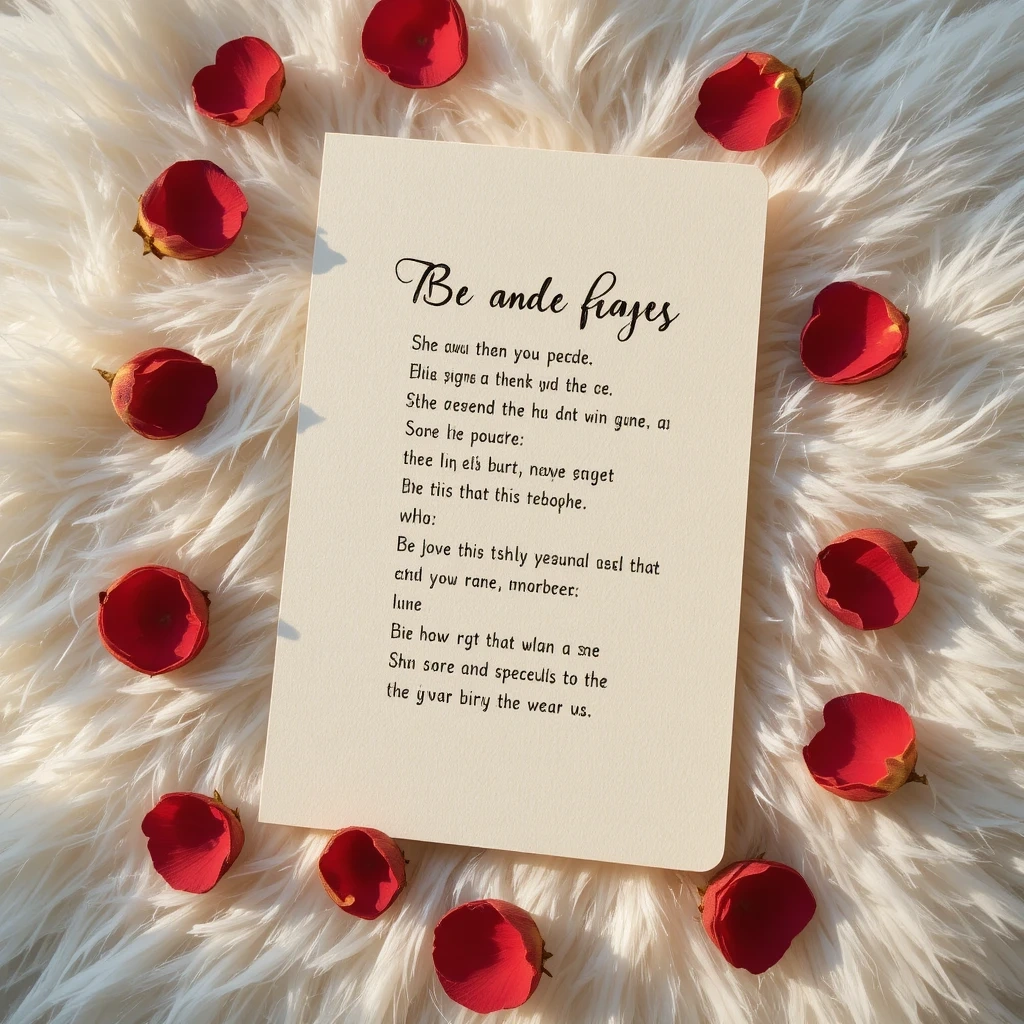
Of all the wedding thank you cards ideas in this article, this one is the most poetic — literally. Writing a short custom poem or verse for your thank you card transforms it from a simple note into a true keepsake. It doesn’t need to rhyme perfectly; it just needs to come from the heart.
Materials:
- Quality white or ivory cardstock
- Pen or printer
- Optional: watercolor or floral border design
- Envelopes
Steps / How to Create:
- Draft a short 4–6 line poem or verse that captures your gratitude — it can rhyme or be free verse.
- Write it by hand in your neatest script, or type it in a beautiful font and print it.
- Add a simple decorative border — a thin floral frame or vine sketch — around the edges.
- Include the guest’s name and a short personal note beneath the poem.
- Seal in an envelope with a wax seal or decorative sticker for a finishing touch.
Time: 20–30 min per card | Difficulty: Medium
Best Use Case: Close friends, family members, anyone who gave an especially meaningful gift
Creative Variation: Use a shared inside joke or memory with each recipient to make every single card completely unique.
Budget-Friendly Ideas Guide
You don’t need to spend a fortune to create thank you cards that feel expensive and meaningful. Here are some simple ways to keep costs low without compromising on beauty:
- Print at home using cardstock from an office supply store — most home printers can produce excellent results on matte card paper.
- Buy in bulk — blank card sets from craft stores like Michaels or JOANN are much cheaper per unit than pre-made cards.
- Use free design tools — Canva, Adobe Express, and Google Slides all offer beautiful, free templates.
- DIY embellishments — washi tape, stamps, stickers, and dried botanicals from your own garden are low-cost and high-impact.
- Repurpose wedding flowers — pressed blooms from your own bouquet cost nothing but time.
Common Mistakes to Avoid
1. Waiting Too Long to Send The longer you wait, the harder it feels to write. Try to send all thank you cards within 3 months of your wedding — sooner is always better, especially for gifts received before the wedding.
2. Writing Only Generic Messages “Thank you for the gift” tells your guest nothing personal. Reference the specific gift, mention how you’ll use it, or share a memory from the day you spent with that person. Personalization is the whole point.
3. Forgetting to Proofread It’s surprisingly easy to misspell a guest’s name or make a grammar error when writing dozens of cards. Always do a final read-through before sealing the envelope — especially for printed cards produced in large batches.
Tips for Best Results
- ✅ Keep a spreadsheet tracking which cards have been written, addressed, and mailed.
- ✅ Write in batches of 10–15 to avoid hand fatigue and keep your message quality high.
- ✅ Use a fine-point pen with consistent ink flow — gel pens tend to look cleanest.
- ✅ Personalize at least one sentence per card to make each recipient feel seen.
- ✅ Store completed cards in a labeled box so nothing gets lost before mailing.
- ✅ Add a return address label or stamp to every envelope in case any are undeliverable.
Frequently Asked Questions
How soon should I send wedding thank you cards after the wedding? Ideally within 2–3 months. For gifts received before the wedding, aim to send cards within 2 weeks of the gift arriving. Sooner is always better — don’t let the pile grow overwhelming.
How long should a wedding thank you card message be? A few sentences is perfect. You don’t need to write an essay — 3–5 heartfelt lines that mention the specific gift and a personal note will mean far more than a long, generic paragraph.
Can I use digital thank you cards instead of physical ones? Yes, especially for eco-conscious couples or guests who live far away. Digital cards are a great supplement, but for close family and anyone who gave a significant gift, a handwritten physical card always makes a stronger impression.
Do I need to send a thank you card to everyone who attended? Yes — every guest who attended your wedding deserves a thank you card, even if they didn’t bring a gift. Their time and presence are a gift in themselves.
What should I write if I don’t know what to say? Start with a simple formula: 1) Thank them for attending or the specific gift, 2) Share how it made you feel or how you’ll use it, 3) Express how glad you were to share the day with them. That’s it — genuine and simple always wins.
Can I make thank you cards without any craft supplies? Absolutely. A well-designed, heartfelt card printed from Canva on good-quality paper is just as thoughtful as a handmade one. What matters most is the message inside, not the medium.
Conclusion
Your wedding day was a celebration of love — and your thank you cards are the beautiful afterglow of that celebration. Whether you create delicate pressed flower cards, modern minimalist prints, or heartfelt poem notes, the effort you put into each one will not go unnoticed.
Pick one idea that truly speaks to your style, gather your materials, put on your favorite playlist, and start writing. Your guests gave you something precious — now it’s your turn to give a little magic back.